

A fun expository writing activity for the holiday season (or really any time of year) is to have your class create a cookbook! Have you ever thought about creating a digital cookbook? Digital cookbooks are wonderful because printing is optional and you can quickly email the url of the cookbook to parents or embed the cookbook on your class blog/website to share with the world.

There are many different ways you could create a digital cookbook but if you are looking for a no prep option, besides assigning the template to students, then you might be interested in checking out my Cookbook Template for Google Slides™. This can also be exported to a PowerPoint presentation. If you would rather use PowerPoint simply go to File>Download As> PowerPoint.

There are 4 different recipe templates you can choose from. Colored vs. black-lined as well as a template in which students just type in their recipe vs. typing in their recipe and providing a picture.
 |
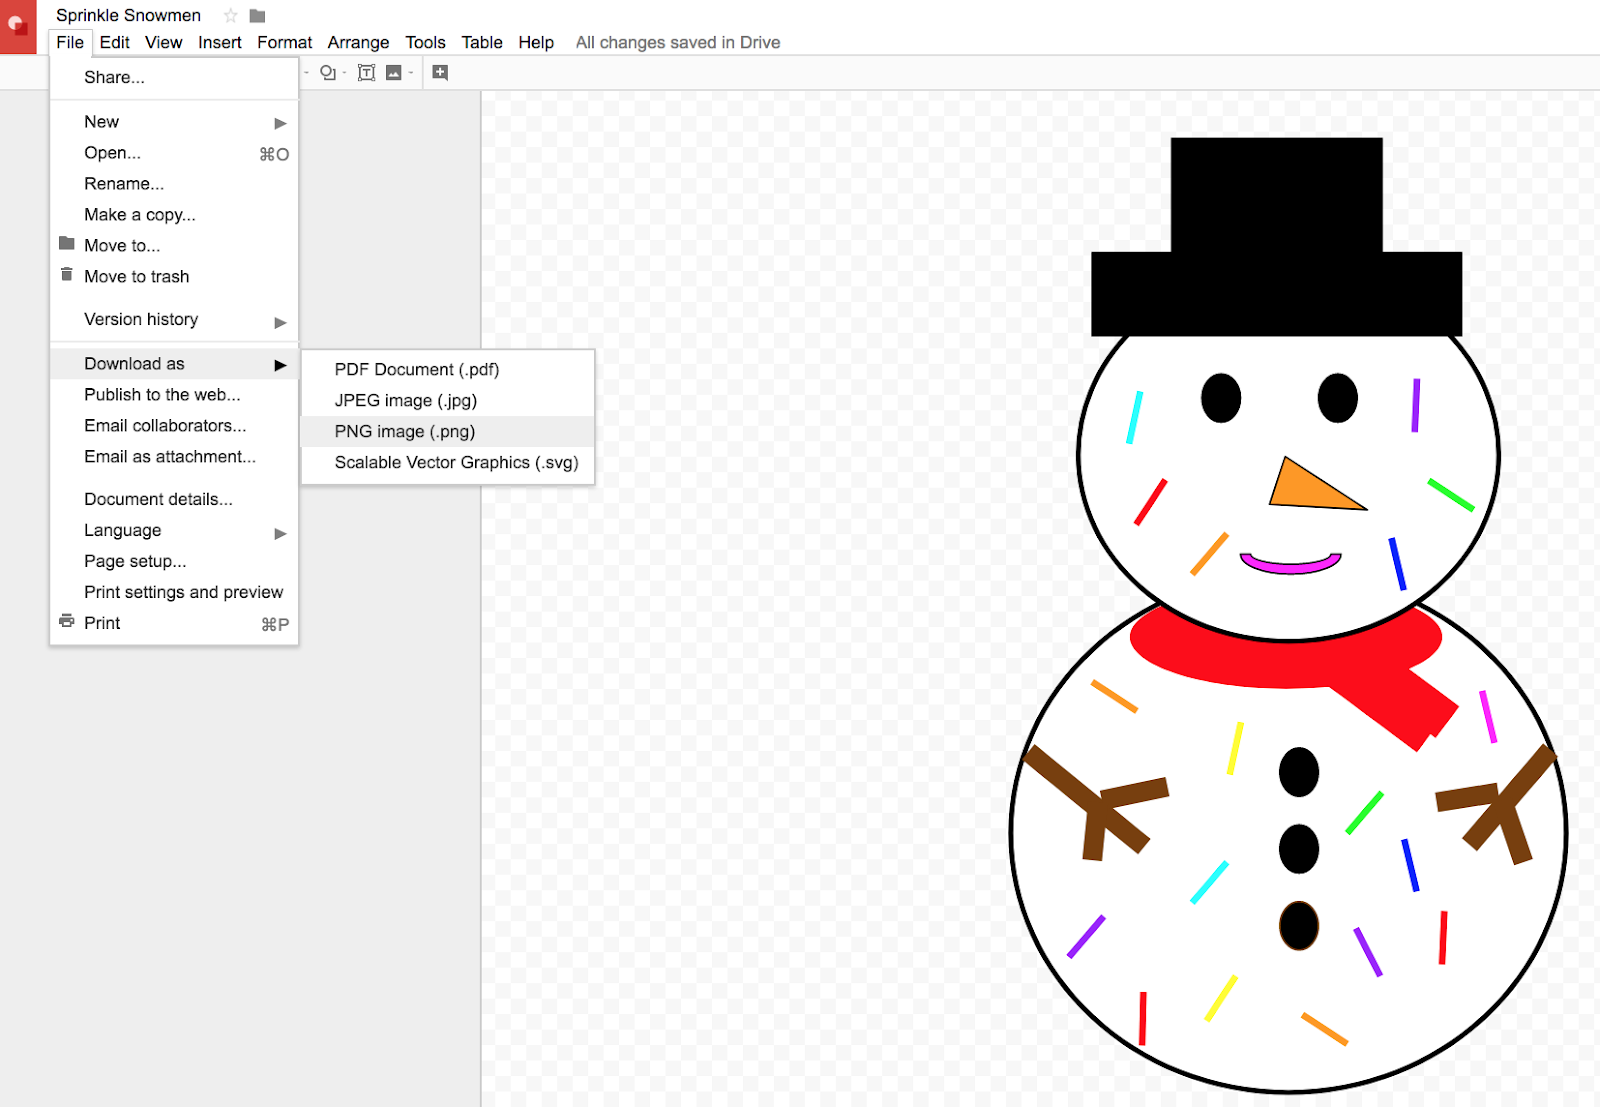
As you can see above, students would have the option of adding an image they search for, adding a selfie or photograph or designing an image in Google Drawing to go along with their recipe. They could also use the drawing tools built right into Google Slides or PowerPoint to design their picture. In the example below I used Google Drawing to design a picture:

All you have to do to get your Google Drawing creation inserted into the recipe template in Google Slides is go to File>Download As>PNG image. This will go to your download folder or wherever you have downloads directed.
To insert your PNG image into your recipe template click on Insert>Image>Upload from Computer (or if you saved it to Google Drive or Google Photos you have the option to pull from there). Then resize your image to fit in the picture box by dragging the corners of your selected image to your desired size.

Independent vs. Collaborative
You have the option of assigning the template slides individually for students to complete or collaboratively in which you duplicate a recipe template slide for each student in your class and assign each child a slide number to work on using the same presentation. If you choose to use Google Slides and want to keep it digital but don't want students working on the same presentation all at once, then check out Erintegration's post about Combining Multiple Slides Into One Google Slideshow. However, try and get students onto the same presentation to save YOU time and get them acquainted with working collaboratively in a digital environment (even though each child will be on their own slide). This past summer I presented Tips & Tricks to Get Students Collaborating in Google Drive™ at our free Teach with Tech Conference. I shared many different tips for helping students collaborate during activities like this! If you missed it you can find my video and resources on TpT HERE. I will also be presenting on this same topic in Detroit at the 2019 MACUL Technology Conference on March 22nd at 10:00am. Elementary students ARE capable of collaborating digitally!
Sharing the Link & Embedding into Your Class Blog/Website
If you want to keep the cookbook entirely digital then you could always just share the Google Slides™url in an email, LMS, Google Classroom, Seesaw or any parent communication app you use.

You can also embed the Google Slideshow into your class blog/website. Go to File>Publish to the web. Click Embed and decide if you would like the slideshow to advance on its own or if you would like your viewers to click the arrows to advance at their own pace. If you decide to have the slideshow advance on its own, you can choose how many seconds you would like for it to stay on each slide by selecting the amount of seconds from the dropdown menu. Click the blue Publish button.

Click on the Embed tab and copy the embed code. This is what you will paste in the html section of your blog/website.

You might have to tweak the width and height in the code to fit within the parameters of your blog/website template.

Print and Assemble
Of course if you want to print and assemble the cookbook you have that option too! I printed the one below and had it spiral bound at Office Depot. My template comes with two title pages, one of which has editable text for you to add your own title! This makes a really cute holiday gift.

That's it!
Other methods of creating a digital cookbook might include using the PicCollage app or Canva.

