Back in 2014 I published the blog post 5 Easy Technology Projects which featured the idea of creating QR Kids as an All About Me or Goal Setting activity. This idea came from an ad I saw on Pinterest for business cards:
I got permission to post the image above to my Facebook page saying, "Wouldn't it be neat to create QR Kids that look something like this?" Emily Albis, a 4th grade teacher who I worked with at the time when I was an ITRT in Virginia, saw the post and asked to sign up for a technology lesson to create QR Kids for her Open House. Students created audio recordings of themselves talking about their goals for the year. (Click HERE to read about other options for creating audio QR codes) Mrs. Albis took photos of her students pretending to hold an object, had them printed and students cut out their bodies. She is the mastermind behind using the binder clip to keep the QR Kids standing! When parents came to the Open House, they found their child "standing" on their desk and were able to scan the QR code to listen to their goals for the year.
I brought this idea back to life in my recent post 10 End of the Year Technology Activities and instead of talking about goals, mentioned that students could share their favorite memories from the year. First grade teacher, Mary-Kate Hagmann, read the post and decided to try it out with her first graders using Seesaw to create the QR codes! Instead of creating audio QR codes, she had her first graders videotape themselves reading their animal reports. Seesaw has a built in QR code generator that makes it incredibly easy to turn the media created into a QR code.
A Few Words About Mary-Kate Hagmann
First, I need to brag about this AMAZING educator from California. Mary-Kate and I connected over Instagram. You can find her @hagmannshearts. Mary-Kate's support and kind words on my posts have seriously made me feel like a rockstar. I often think, if she can make ME feel this way about myself through basic digital interactions and typed words, then how in the world does she make her students feel who get to be with her physically every day? Mary-Kate is a Seesaw Ambassador and Donor's Choose Teacher Ambassador who has gone over and beyond to write grants for technology and other classroom supplies. She has already had 15 projects funded!
Mary-Kate posted the following pictures and video of the QR Kids her students created on her Instagram account and educators went NUTS! I then reshared one of her adorable photos on my account and had so many amazing questions. After chatting, both of us thought it would be a good idea to address all of the questions about Seesaw in a blog post so here we are 😃.
Mary-Kate's first graders created QR Kids for their animal research projects. When students scanned the QR codes, they were taken to a video of the report being read aloud that was stored in Seesaw:
Miss Hagmann has the upgraded version of Seesaw (SeeSaw Plus); however, those who have the free account can still do this project. Her class is 1:1 ipads. Even if you have only one device, you can easily carry this out!
Steps Mary-Kate's Class Took to Create Their QR Kids
1. Mary-Kate's students launched Seesaw and videotaped themselves reading their reports within the app (tap + sign>Video) and added their video to their specific student portfolio.
2. Students posed for a picture as if they were holding a box and Mary-Kate snapped their picture with an ipad (those who had a media release form on file). She then printed their pictures on card stock and cut out their bodies. You could always take student pictures and have them printed at Target, CVS, Walgreens, etc. if you don't have access to a colored printer.
3. Students tapped on the three dots in the lower right hand corner of their video and selected Get Item QR Code.
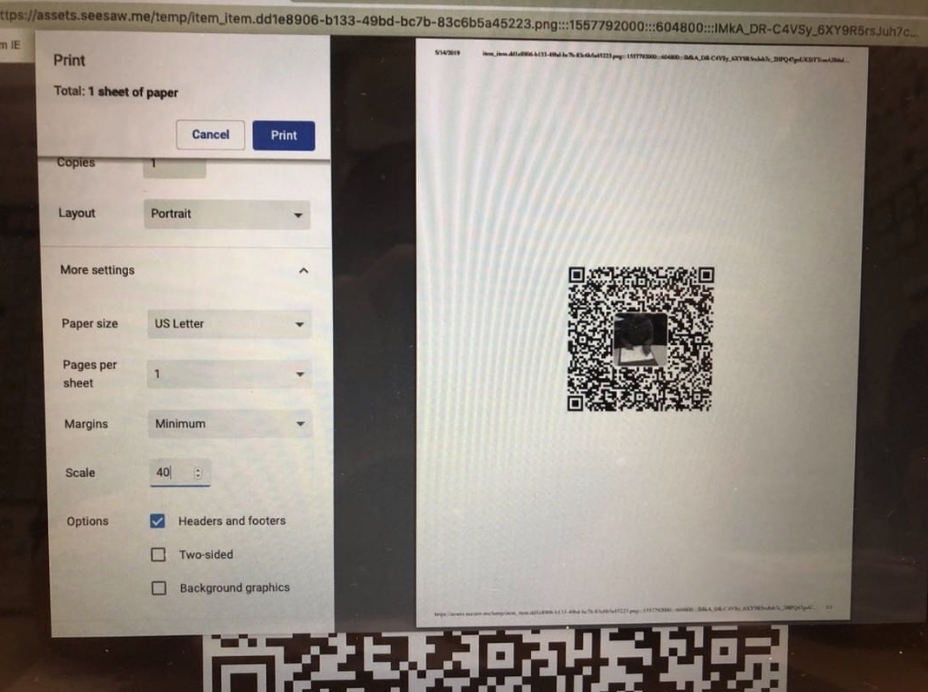
5. The QR Code appeared and then they selected Print.
6. Mary-Kate asked her students to set the print size to 35% so it would be proportionate to the photos. Print.

7. Then she had students cut out their QR codes and paste them onto their picture cut out.
8. A binder clip (Amazon affiliate link) was attached to the bottom of the QR Kids so they can be free standing.
That's it!
So Many Possibilities
There are so many different ways you can create QR codes and even more ways you can connect them to various types of media. I love how Julie Zappile had her students link their QR Codes to Flipgrid videos:
Instead of QR Codes, you could create trigger images in the HP Reveal app to provide an AR experience. Get creative!
Students and parents loved this part of our room for Open House! @JGTechieTeacher @Flipgrid @TCRWP Next year, I am in search of microphones- @hmosertweets pic.twitter.com/9Dmjy5I9vL
— Julie Zappile (@JulieZappile) May 26, 2019
Instead of QR Codes, you could create trigger images in the HP Reveal app to provide an AR experience. Get creative!


